I want to share with you how I plan for a typical home school year. You may find some of the ideas I share helpful. If so, I’m glad to help!
First, I go to http://donnayoung.org/calendars/vertical-monthly-calendar.htm and print the calendars I will use for the year(pictured below). I typically have 165 days in my school year. I live in a state that does not mandate how many days we are to have school, so you may want to check your state’s laws first. Next, I go through the calendar marking any known days off, like the girls’ birthdays if they fall on a school day, Easter, Christmas break, etc. (One special treat I do for the girls is give them their birthday off and they get to choose what to do that day, within reason!). Next I decide what day to start school. It is generally the day after Labor Day. I also choose a target date to finish for the year. It used to be around the second week of June but this last year I was able to make it the end of May. Last year the girls wanted to end even earlier so they worked harder to get done a few days before the target date! Next, I count how many days I have left on the calendar from my start date to my end date. I deduct 165 days from the amount I counted and the leftover days will be our days off. I split the days up among the months, which usually ends up being about 2-3 days off per month.. For example: From the start to the end date was 189 days. I deducted 165 from 189 and totaled 24 days leftover. I split those days up into our 9 months of school, which gave us about 2-3 days off per month. I don’t actually choose the days off for each month until I am lesson planning for that month; that way I can choose the best day for us according to what we have going on. For example: for the month of November we celebrate two birthdays. My oldest loves horses and there is a horse show so we took a day off to go to that. My other daughter, whose birthday is November, is in The Nutcracker downtown and her dress rehearsal is the Wednesday before Thanksgiving. We took the day off so we do not have to rush school to get there on time.
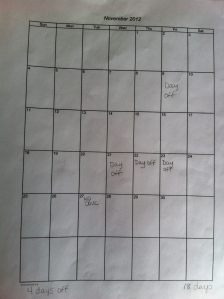
After I have my master calendar done I start planning each girl’s individual lesson plans. I use the same calendar template and mark all the days off, how many working days of school per month, how many days off and then start working on their individual subjects (work in pencil for when you have to erase a lot like me!! :)).
I then mark their calendars like this: .
‘M’ stands for Math; ‘Sc‘ for Science; ‘He’ for Health; ‘Geo’ for Geography; ‘Bio’ for Biology; ‘E’ for English; ‘Wr’ for Writing (They know what each of these stand for). I only do one month at a time, in case we get behind in a subject or two so I won’t have to erase and change the lesson we are on.

I use my Girl’s Daily Schedule 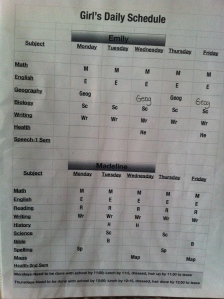
to see which days they have each particular subject. (Over the summer I take each piece of curriculum we will use for the year and figure out how many lessons and tests and how many days per week we need to study it in order to be done by our end of the year target date. Check out my page on planning over the summer.)
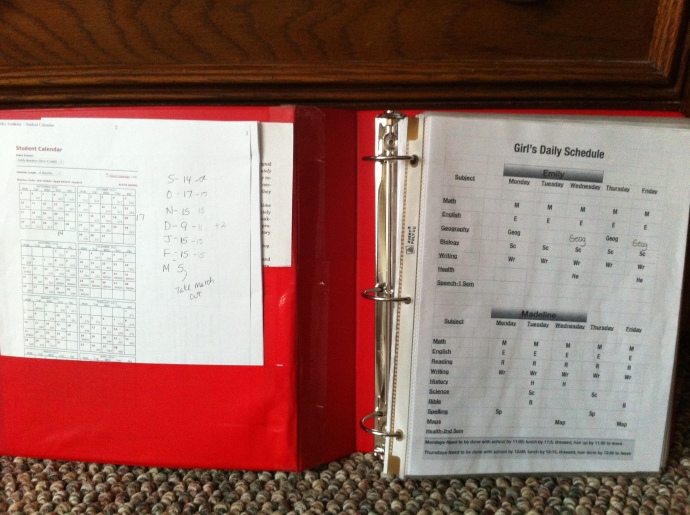 After I get each girl’s monthly calendar done I put them in an 1 1/2 inch binder and separate them by the ‘Write-on tab dividers’ I get from Walmart. I put my master calendar first and then separate the girls from oldest to youngest. Next I copy any answer keys I may find helpful to have close by and put them in the binder, separating them by name of subject or book title. This year I went the extra mile and copied most of my answer keys and put them in there so I didn’t have to search for the book to grade the paper or test. It is all alphabetized in my binder. I also had a couple of the kids’ subjects that I needed to figure out how many lessons they had to do each day, for example: My 9th grader is doing the ‘Easy Grammar Ultimate Series-Grade 9‘ which is 180 lessons along with 18 tests. I figured out how many lessons per day she had to do to get done in 165 days. She doubled up on lessons for about two months, which was not a big deal because they are pretty simple and fast. So, I typed out each month and how many days of school per month we have and how many lessons and tests she has each month.
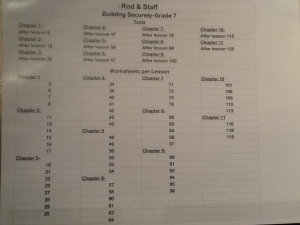
I also did that for Rod and Staff English. I figured out how many lessons, which lessons had worksheets and how many tests and typed it all out so when I am ready to work on a monthly lesson plan all I have to do is open up my folder and see which lessons have worksheets and when the next tests is. It’s a bit of work in the beginning, but saves a bunch of time during the busy school year when I don’t have a ton of time to page through indexes to see when the next test is or if a particular lesson has a worksheet with it. Here’s my example:
I then place any information or calendars in my binder from our co-op for any classes they are taking, just to have it handy. After that, I am finished! I use it daily and monthly to work on lesson plans.
After I have the binder finished, I take my girl’s individual daytime planners and work on about two weeks at a time of their specific work for the day. Here is an example of my 9th graders:
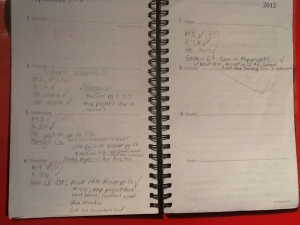 I give individual instructions or lessons per subject. All the girls have to do is open their planner up to the date and see exactly what needs to be done. They mark it off as they get done. I have two bookshelves in my living room and on one shelf I have a five slot paper tray where they put in any folder or paper that needs checked or graded. My goal is to have it cleared out by Friday. If it is a test I have graded I will normally put it in the 5th slot and will eventually get around to marking the grades into my grade book I have designed on my computer. I have an example of my grade book under the ‘Charts’ tab. Like I said, I love charts to help me keep organized! It only takes me about 45 minutes to work on two weeks worth of individual lesson plans for my four girls daily planner because of the extra mile I went before school started of figuring out how many lesson, tests and extras that need to be done.
If you ever have any questions, comments or suggestions, please feel free to leave a comment. If you would like to share this, you are welcome to. You can pin it to Pinterest or Facebook. My hope is that it will help someone, even a little, to organize their home school day and year just a bit more!
Have a great home school year!

